Blog
View All Blog Postings
Wanted for Breaking & Entering
 What’s not to like about furry little critters? Squirrels are impressive, if frantic little athletes and raccoons have a certain mischievous appeal. If you take the time to observe them, birds are fascinating. But…when these little charmers invade our homes, they turn into obnoxious, destructive, noisy, fertilizer factories. They eat our soffits and clog our dryer vents. They smell bad. They become vermin that must be ousted or eliminated. It’s not entirely fair to blame them. That dryer vent or attic makes a perfect nesting site, sheltered from the elements, inaccessible to most predators with plenty of room for the youngsters to play.
Eviction is tough and extermination is distasteful; so here are some hints to help keep the critters from getting into your home.
- Inspect the building exterior for loose boards, unsealed openings and unprotected holes in the walls, soffits, etc.
- Trim any overhanging trees and remove vines and ivy from walls. These are highways for small animals like squirrels, rats or even snakes. (On the plus side, if you have snakes, you probably don’t have squirrels or rats!)
- Where appropriate, install insect and bird/animal screens at vents and openings. This can be tricky. Improperly screened dryer vents can result in reduced efficiency or even a fire hazard and screening may be disallowed in some jurisdictions. It’s also possible to reduce ventilation below acceptable levels in areas like soffit inlet if you install screening that’s too fine.
- If any new mechanical devices are going to be installed, require that they are appropriately protected with screens, guards, etc.
- Survey the building exterior and note ledges and outcroppings that are attractive to birds (look for bird droppings) and install bird repellants or guards.
- Make sure that windowpanes and screens are in good condition.
- Make sure that all ground level doors have an auto-close feature (springs, pneumatic closures, etc.). Nothing is more inviting to squirrels and raccoons than an open door.
Don’t Forgo The Soil Sampling
 Occasionally we run into a building owner that regards soil sampling and testing as an unneeded extra expense and asks if we can forgo this effort. Generally, soil is sampled by using a drill rig that bores into the ground up to 40-feet, or more deep. Small samples of the various soils that are found at different levels or strata are taken to a laboratory for testing to determine the composition of the soil, moisture content, and other properties.
In the field, the various soil types encountered are visually classified according to accepted standards and stiffness of the soil at different depths of the boring. These engineering properties are necessary to determine the type of foundation needed for a retaining wall or building, depth of a storm water infiltration facility, or even in the selection of a proper pavement profile.
Nearly all local municipalities will require soil testing for structural retaining walls (over 3-feet tall), storm water infiltration facilities, and buildings. We routinely obtain soil borings to help evaluate suspected building settlement conditions to learn the impact that the soil may have on the apparent building movement and help design the foundation underpinning repairs. If soil is not sampled and tested for its engineering properties, unexpected expenses can arise and the job progress can stop after the excavation begins and unsuitable soil layers are found.
You’re Welcome!
It goes without saying that engineers aren’t known for their fashion sense or style, but no matter what profession, it can often be difficult to decipher the meaning of a dress code. There is no need to arrive at your next event wondering if you got it right. Below is a run-down by the common US dress codes and what they mean. Now even engineers can be appropriately dressed….well maybe : ) 
Helpful Tips For Daylighting Design
 1. Best type of light is natural daylight. Availability of daylight changes across the day. Successful daylight for a building depends on site location, building facade orientation and size of openings.
2. Allowing daylight into interior spaces saves on the electricity bill and daylight provides natural healthy environment for the residents.
3. The head height of a window opening determines how far light will reach inside the building, therefore don’t obstruct existing window heads with decorative shades.
4. Paint ceilings and walls with light colors to maximize daylight reflectance inside the building.
5. Avoid large windows on South and West facades, which gets direct daylight inside the building, It will create unwanted solar heat gain and fades color on interior finishes.
Planning For A Handicap Ramp
 If you are planning to build a wheelchair ramp (also known as handicap accessible ramp) in an existing building, it would be best to have a checklist of design considerations before starting the project.
- Familiarize yourself with the American Disability Act (ADA) and American National Standards Institute (ANSI) A117.1 that define general design parameters.
- Most states and local jurisdictions have adopted the International Building Code (IBC), published by the International Code Council; however, states, counties, and cities can impose different regulations. Always check with your local permit office for relevant code and permit requirements.
- Handicap ramps cannot exceed a slope of eight (8) percent. That means your ramp should not be steeper than one-unit in height for every twelve-units of length. For example if you have to accommodate a height difference of twenty-four (24) inches, the ramp will be two-hundred eighty-eight (288) inches (24 feet) long. The maximum allowable height is thirty (30) inches.
- Pay close attention to the requirements for ramp width, headroom height and landings. Minimum ramp clear width is thirty-six (36) inches, minimum headroom height is eighty (80) and minimum landing width is sixty (60) inches.
- The height of railings must be between thirty-four (34) to thirty-eight (38) inches above the walking surface. Handrails can be constructed from a variety of materials, such as wood, metal, or synthetics, provided they comply with code-mandated requirements for strength and grasp-ability.
- Ramp surfaces should be slip-resistant and able to resist deformation by point loads. A walking person’s weight is distributed over a fairly large area, whereas that weight is concentrated onto the much smaller areas of wheelchair-tire contact patches
Leading The Way In New Hotel Design
 ETC has been selected as the architectural and engineering firm to design a NEW, 85 room, Home 2 Suites hotel in Atlanta, Georgia. ETC’s lead architect, Shabbir Kazmi and Chief Structural Engineer, Chris Carlson will be heading the team from design to completion.
Hilton is a beacon of innovation, quality, and success in the hospitality industry and ETC is pleased to be included as a small part of the team.
Degrees of Study
 Engineering studies fall into a number of categories, from general condition surveys (such as reserve studies and pre-purchase inspections) to problem-solving investigations and forensic examinations. Within those categories, there are generally three (3) levels of need.
Carbon Monoxide Check

Ventilation systems are critical in enclosed parking garages and most systems installed over the past ten years or so are controlled by carbon monoxide detectors. Without properly functioning, accurate detectors the exhaust fans of garage ventilation system will not activate to remove toxic fumes from vehicle exhaust before they reach unhealthful levels.
Carbon monoxide is an odorless, colorless gas that’s a bi-product of combustion, such as occurs in car and trucks engines, standby generating systems, gas-fired furnaces and dryers, etc. CO from such sources can build up in enclosed or semi-enclosed spaces and people therein can be poisoned by breathing it. The most common symptoms of CO poisoning are headache, dizziness, weakness, nausea, vomiting, chest pain, and confusion. High levels of CO can cause loss of consciousness and death.
Given the hazards associated with carbon monoxide, now is the time to replace old sensors in your home and have your garage ventilation systems professionally inspected and tested
Advice From An Architect

- Try to find original drawings or photographs that best depict the original design
- Fads come and go. Consider timeless style for finishes and colors, pick options that are appropriate and blend with surrounding materials.
- Understand performance classifications for windows published by the American Architectural Manufacturers Association (AAMA) and National American Fenestration Standards (NAFS) and how they relate to your building.
- Cold drafts are uncomfortable and energy loss is costly. Select windows that incorporate thermal barriers, double-pane, insulated glass and have been tested and certified by the American Architectural Manufacturers Association (AAMA).
- Outdoor noise from wind, traffic, barking dogs, etc. can be very distracting. Select windows with good acoustical (sound-reduction) properties.
Project Of The Year Goes To…ETC!

Once a year, each individual chapter holds a project of the year competition and accepts applications from its chapter members. Typically, the restoration projects submitted are unique and complex in nature. This year, Engineering and Technical Consultants (ETC) was awarded first place for the Baltimore-Washington Chapter project of the year.
The project submitted was for a major roof replacement at Greens I of Leisure World, 55+ community located in Silver Spring, Maryland. Please view the slide presentation to see the extent of this major restoration project.
[themify_button style=”large light-blue flat rounded” link=”/wp-content/uploads/2015-ICRI-Award_web.pdf” target=”_blank” ]View Slideshow (PDF)[/themify_button]
Congratulations to Bobby Radcliff, P.E. (ETC) and everyone involved. Job well done!
Lobby Design Essentials

A. Building Codes.
- Critical pre-design efforts would be to determine local code requirements and perform a full code analysis.
- It’s essential to define the nature of the renovation in order to identify applicable code requirements. Building codes generally differentiate between additions to existing structures and upgrades to existing spaces, which are defined as alterations.
- Determine ADA accessibility for items such as doors and hardware, railings, ramps, and height of reception desk.
B. Aesthetics of Finishes, Lighting, and Sound.
- The lobby is a first step into the building and a light color palette is generally preferable for walls. Dark colors tend to evoke more somber feelings.
- Lobbies experience heavy foot traffic and the introduction of whatever the outdoors has to offer (mud, water, debris, etc.). Floor coverings should be slip-resistant, durable, and easy to maintain. Unyielding flooring materials (ceramic tile, stone, etc.) should incorporate proper control joints to help prevent cracking. Walk-off (entrance) mats should be used to help remove water and solid contaminants from shoes. If selected as an afterthought, an entrance mat can be an eyesore; therefore, they should be incorporated into the design and coordinated with lobby finishes and furnishings.
- Double-height lobby spaces are attractive and spacious, but can exhibit undesirable sound characteristics. An excess of hard finishes can reflect too much sound and create reverberation. Area rugs and wall hangings will absorb sound and help reduce echoing.
- Decorative wall and ceiling panels are easy ways to finish a lobby space, but they must be appropriately fire-rated and the substrate must be able to support them.
- Lighting is essential to lobby design. Incorporating day lighting is a great way to freshen and improve the quality of lobby space; however, windows are thermally inefficient. Energy loss can be substantially reduced if windows incorporate thermal breaks (for metal windows), multi-pane glazing, inert-gas-charged interpane cavities, and low-emissivity (heat reflecting) coatings. Accent lighting on artwork and furnishings should be designed to enhance their visual appeal and optimal lighting can vary from piece to piece. What works well for an oil painting may not be desirable for a sculpture. Lighting must be ample in areas of foot traffic, but muted lighting can be more desirable in seating areas, depending upon the intended use of the space.
- Thermal comfort, fresh-air circulation, and humidity control are critical to any renovation project. Major changes to a space can alter thermal properties and air circulation. Heat transfer (load/loss) calculations should be performed to determine heating, ventilation, and air conditioning requirements and HVAC systems should be modified, augmented or replaced as needed.
- Where present, security/reception desks are key elements of lobbies, which require careful planning and design. It should be welcoming and accessible, particularly with respect to ADA requirements. The countertop should be durable and easy to maintain and clean/disinfect.
- Furniture and accent pieces should usually reflect the building at-large. Modern glass and chrome furnishings might be jarring in a Victorian-era structure. “Trendy” comes with some risk. What’s in vogue now can be considered dated or tacky in just a few years.
- Art is entirely subjective and selecting pieces for public display can be tricky. It should be “tasteful” and devoid of subject matter that can offend (nudity, violence, religious themes, etc.).
- Amenities such as WIFI or charging stations can be nice additions, but your lobby could become a lounge if you make it too entertaining and comfortable.
3D Rendering
If you are planning major renovations on your property, you would probably like to see an image of the project before the work begins. With 3D rendering (or 3D modeling), a realistic image of the property can be developed so you know what the project will look like when completed.
With 3D modeling, a design professional can provide numerous rendering options to meet a client’s particular tastes and needs. For example, a client may want to see what a project façade will look like with either brick, stone, or vinyl siding and how they match with an asphalt shingle or standing-seam metal roof covering. These renderings are also effective when presenting ideas of renovations to Community Associations and City Planning Officials, often resulting in faster and more efficient approvals.
3D rendering is a rapidly growing technology and simple renderings can be made with home computers. However, complex renderings with material textures, lighting, and realistic environments require extensive training and special computers with sophisticated graphic capabilities.
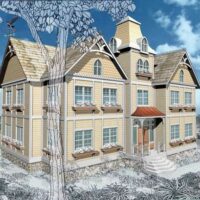
Below is a step-by-step example of an “Arts and Crafts” style house rendered in 3D Max and Photoshop.
Step 1. Using 3D Max, basic geometry is modeled, perspective view is set up, and test materials for roof and siding are mapped on the model.
Step 2. Using 3D Max, natural lighting and shadows are tested on the mapped materials, with a blue sky background.
Step 3. Using Photoshop, color balance and image contrast is adjusted. Sketched landscaping features are added.

